Winterizing a 3.0l 4cyl mercruiser inboard engine
In Canada, it is very important to properly winterize marine equipment. Particularly inboard engines. If an engine is left full of water, and it freezes it will crack the block. an engine with a cracked block will need to be rebuilt, or replaced, and can cost upwards of $10,000.00. Though getting water out of the engine is not the only important part of winterizing. you should also stabilize the gas, change the oil, change the drive oil, and fog the engine.
For reference All Pictures on this page are taken from a 3.0L Mercury Mercruiser engine mounted in a Glastron MX175 (2008) Boat.
We install Amsoil synthetic lubricants and high efficiency filters. These premium products offer maximum protection and extend equipment life, and deliver increased performance.
Products Installed
Amsoil 10W-40 Marine
EaO59 Oil filter
Gasoline Stabilizer
Quickshot
75/80W-90 Marine gear lube
Products Installed
Amsoil 10W-40 Marine
EaO59 Oil filter
Gasoline Stabilizer
Quickshot
75/80W-90 Marine gear lube
Fuel stabilizer
There are many brands that make fuel stabilizer. We use Amsoil. Amsoil makes very high quality lubricants and stabilizers. First we add gasoline stabilizer. Then we add some Amsoil quick shot. The quick shot is designed to fight ethanol, and also cleans carburetors. Once both are added I had about 1 liter of fresh fuel. this insures that the fuel conditioners make it to the tank. Boats can sometimes have long fuel lines that have bends from the filler to the tank.
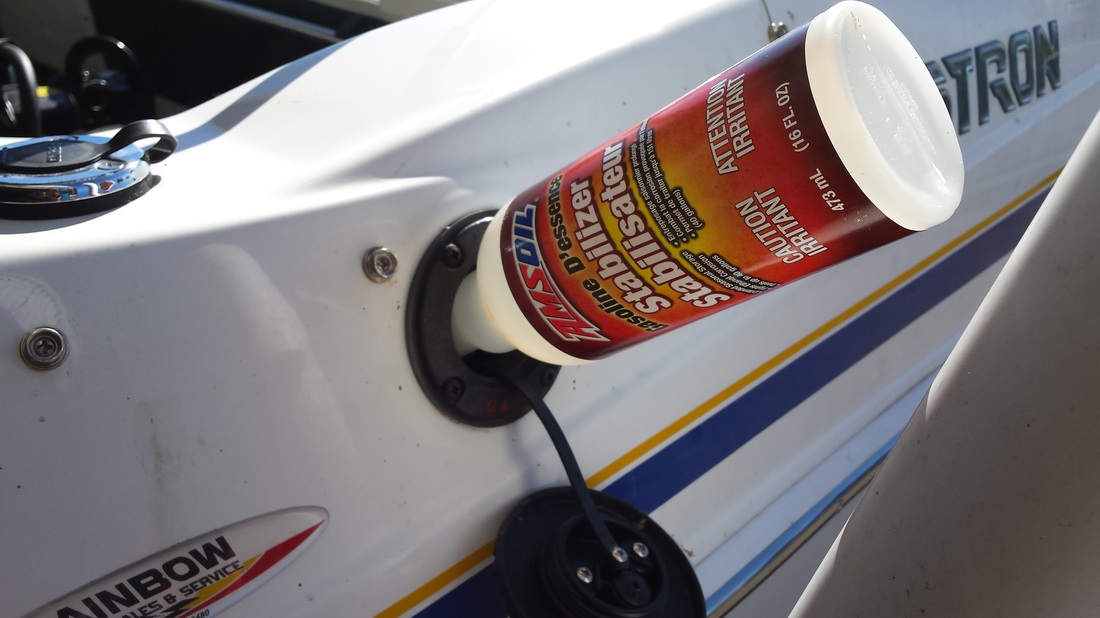
Amsoil Stabilizer
|
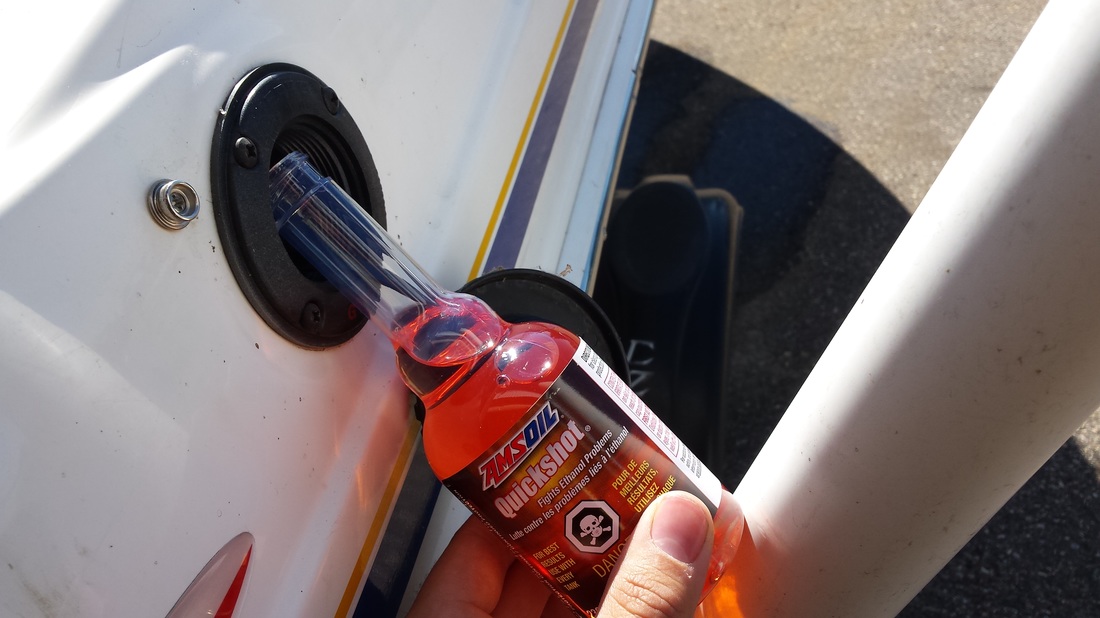
Amsoil Quick Shot fights ethanol!
|
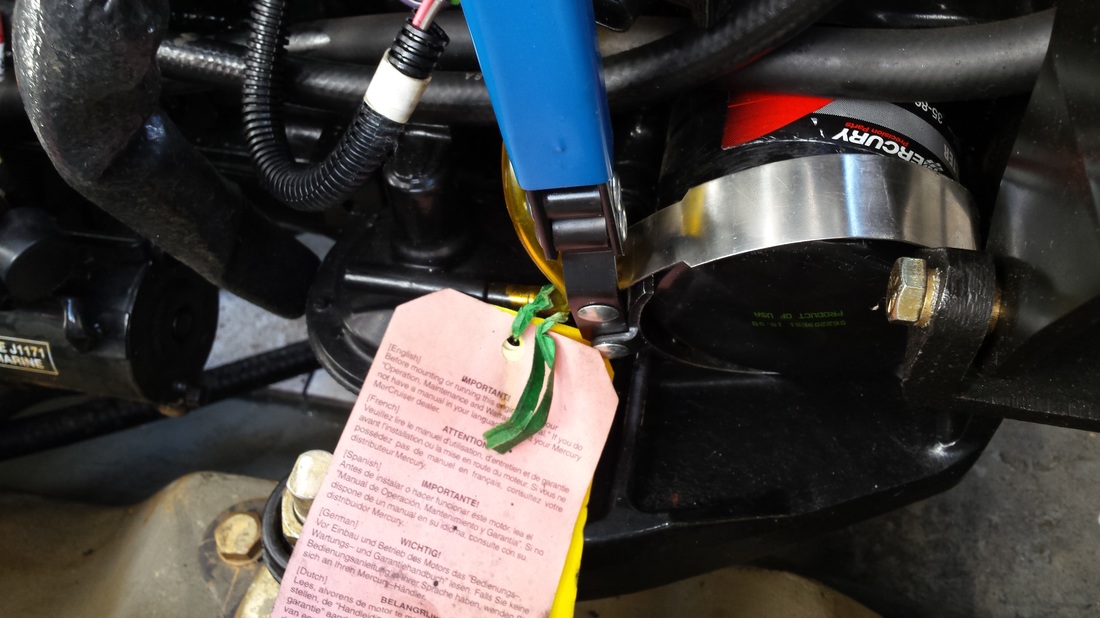
Final drive (gear case) lubricant
On a marine engine, your gears case is essentially your transmission. It is important to make sure it has fresh, quality oil in it. because the leg of your engine is submerged in water, its not very hard for it to become contaminated with water or exhaust. Its important to change it to prevent corrosion and rust on important components inside. This can also be used to indicate water, or exhaust leaks.
First tilt your leg down. (this also drains some of the water out of your exhaust, and pump) You will need a pump for the fresh oil, a flat screw driver, and an oil pan. Place the oil pan under your leg.
First tilt your leg down. (this also drains some of the water out of your exhaust, and pump) You will need a pump for the fresh oil, a flat screw driver, and an oil pan. Place the oil pan under your leg.

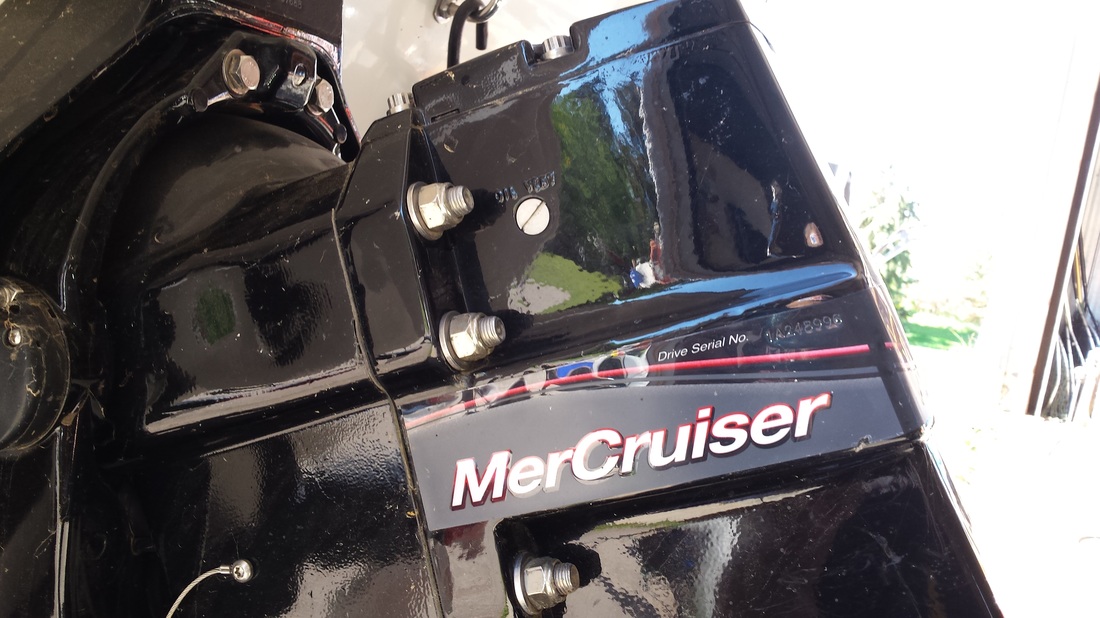
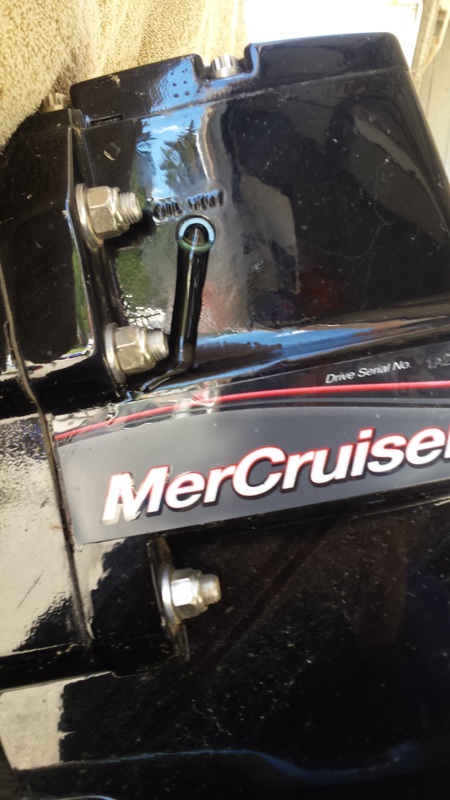
Shown is the Alpha One drive
The drain plug on this engine is located on the bottom of the gear case. Just above the top of the skeg. Some are located behind the prop, and you must remove the prop. On this model you do not need to remove the prop. You just need a flat screw driver. It should not be particularly tight.

Drain Plug
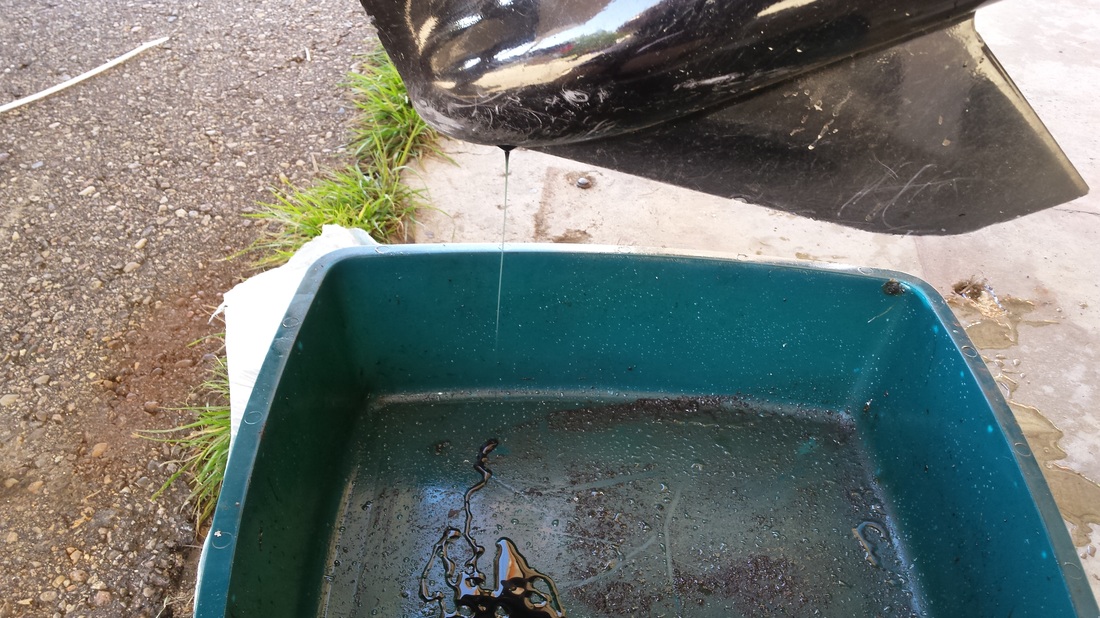
The unit is now draining the old fluid
Now that the drain plug is out, locate the vent plug. Removing this will allow the fluid to drain faster, and will need to be removed to fill the unit anyways.
Vent plug
Now that the plugs are out, pay attention to the drain plug. It has a magnet on it that collects metal shavings. it should be cleaned before it is re installed. Also take note if the seal is still on it. If the seal is still on the gear case, remove it now and put it on the plug. you will notice the top and bottom plugs are not the same. the top plug does not have a magnet. The plug with the magnet goes on the bottom. The lower unit will take a while to drain. If you want to get as much of the old oil out as possible, now is a good time to change the engine oil. Let this drain for a while.
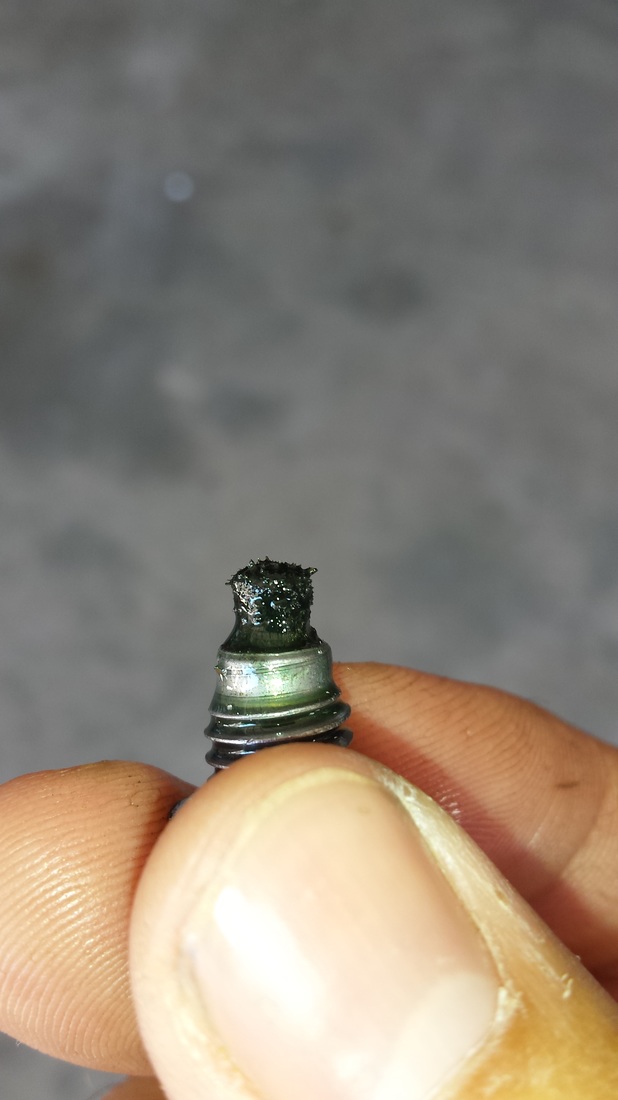
Metal savings on the drain plug. This is normal after a full season of boating.
|
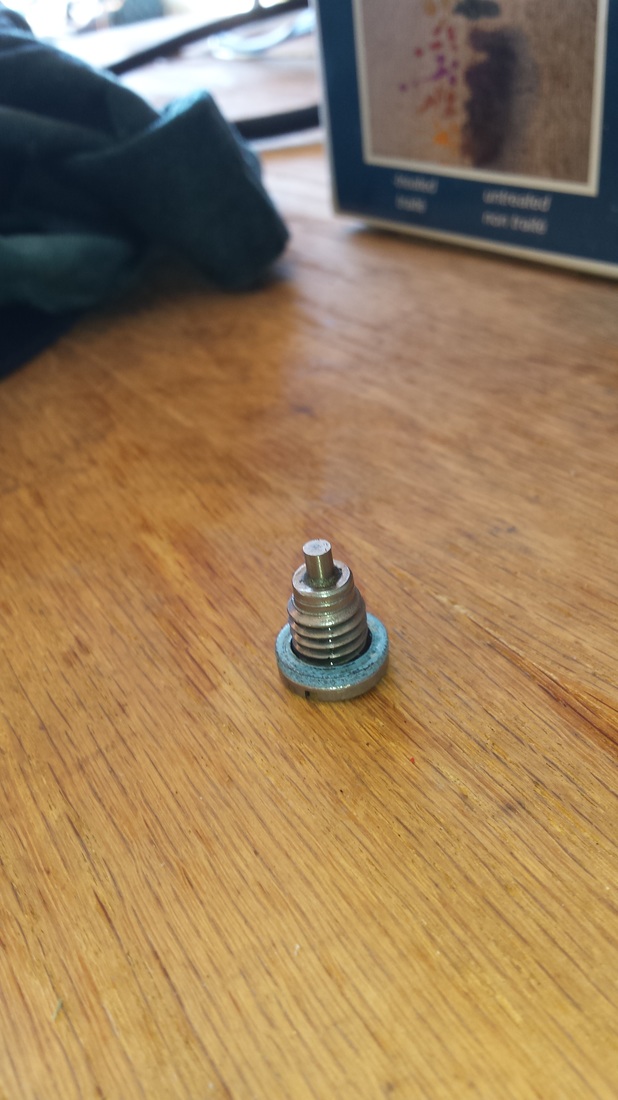
The drain plug should be cleaned before installation.
|
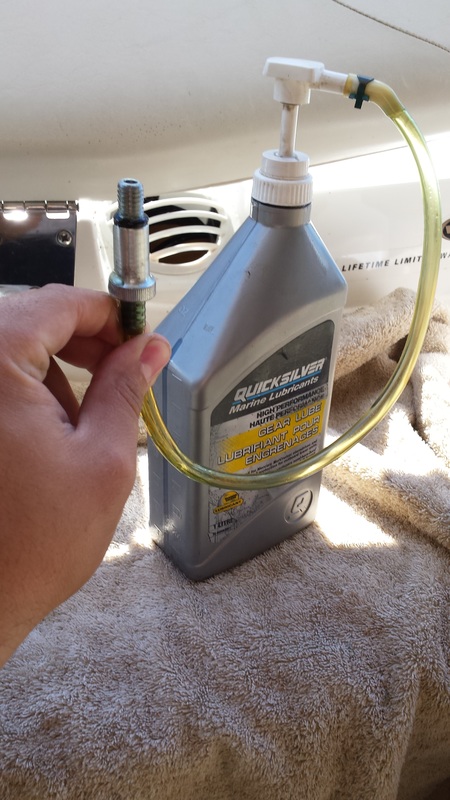
Time to fill the gear case back up. This is where you will need your fluid pump with the gear case fitting. Leave BOTH plugs out at this point. The gear case on a marine engine should always be filled from the bottom. Never from the top. Thread the end of your fitting into the gear case and start filling it. You will need to stop part way and refill your bottle for these large cases. On a smaller engine one bottle will likely fill it up.
|
|
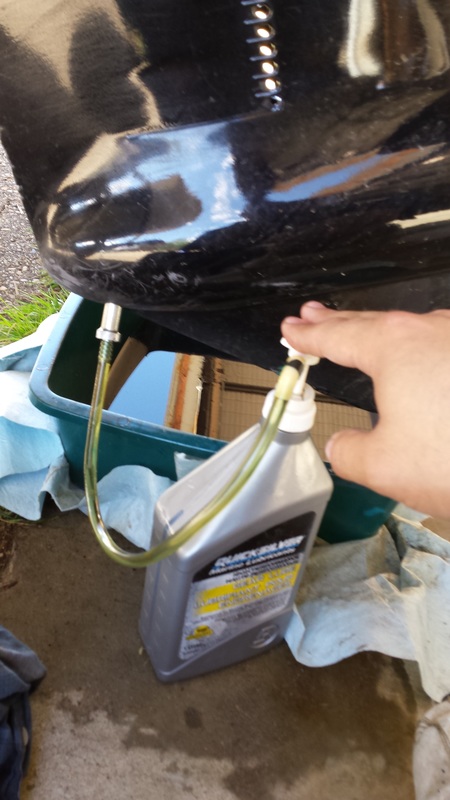
When you see clean oil start coming out of the vent plug, The gear case is full. Install the vent plug first. Once the vent plug is tight, give the pump a few more pumps, as you will lose some oil when you remove the filler hose. Remove the hose and quickly install the drain plug. By this time you should have made sure the seal was on the plug, not on the gear case. If the seal was still on the case it may have come off on your filling adapter. Getting it off and installing it on the plug now waste time, and clean oil that is draining out.
This indicates that it is full. Install this plug first
Now that the gear case if full, and the plugs are in check your reservoir. If the oil was contaminated you can drain the reservoir and fill it with fresh fluid. If you choose not to drain it, it will likely still need to be topped up. Add oil up to the operational range mark. After draining the gear case this may drop a bit. If you lose excessive amounts of fluid it may be time to check your seals.
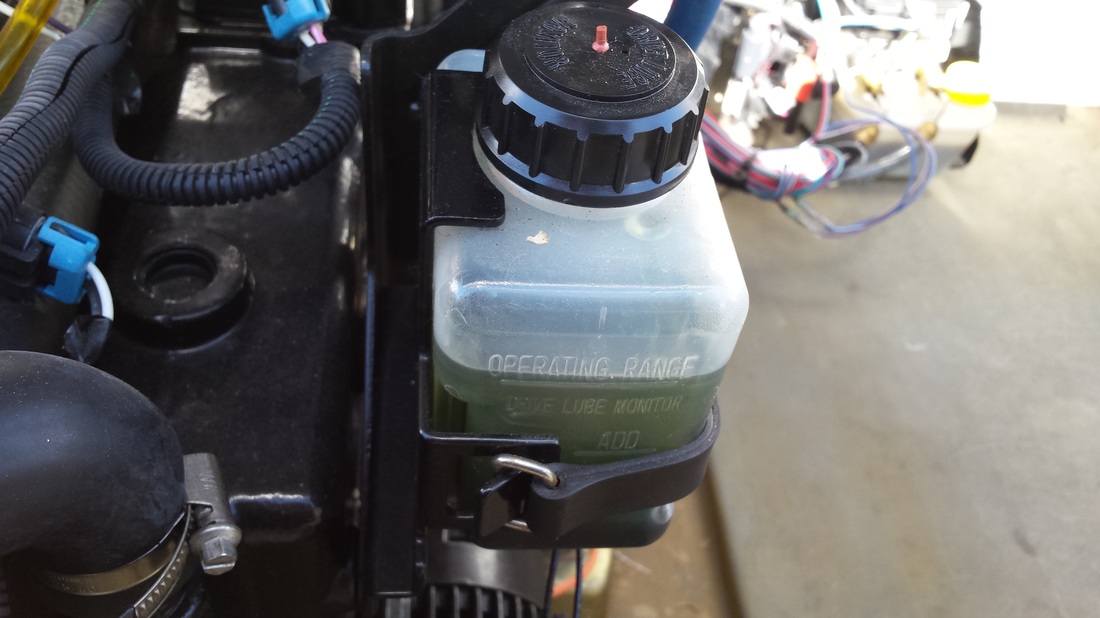
Top off the drive fluid reservoir
Engine oil & Filter Change
First things First! locate the engine oil dipstick. Check the engine oil level. A higher than normal level may mean fuel contamination, or water getting into the engine. Water contamination will cause the oil to look milky. We will be attaching a pump onto the dip stick fitting, to pump the oil out of the oil pan.
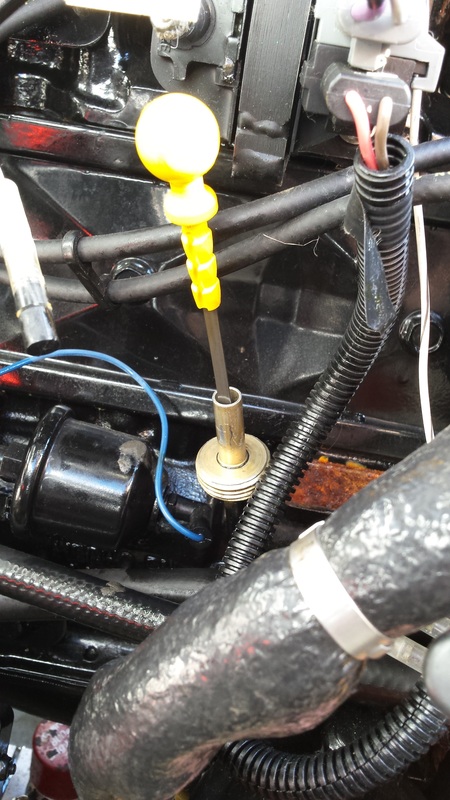
This is where the oil pump will attach.
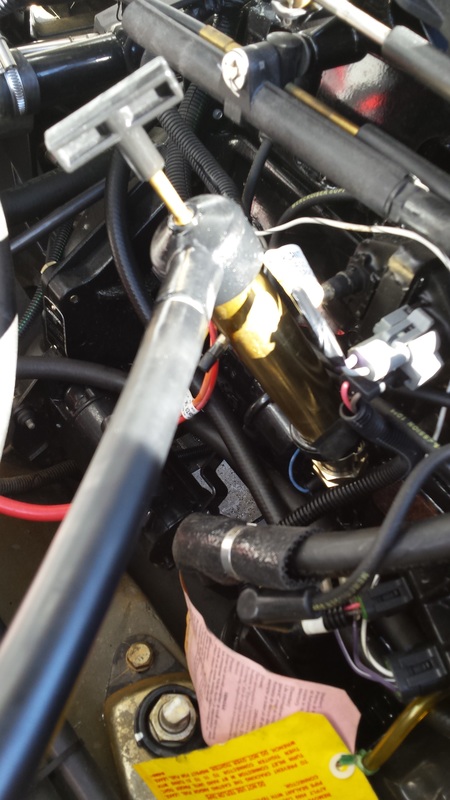
This is the pump installed
With your pump installed, get an empty jug, preferable 1 gallon or 4 liters, and begin pumping the oil out. This part can be a bit time consuming and tiring with a hand pump. If you feel like you are pumping more air than oil, try tightening the pump on the dipstick fitting with a wrench. If this does not help, you may have a bad seal on the fitting, or a bad seal inside of the pump.
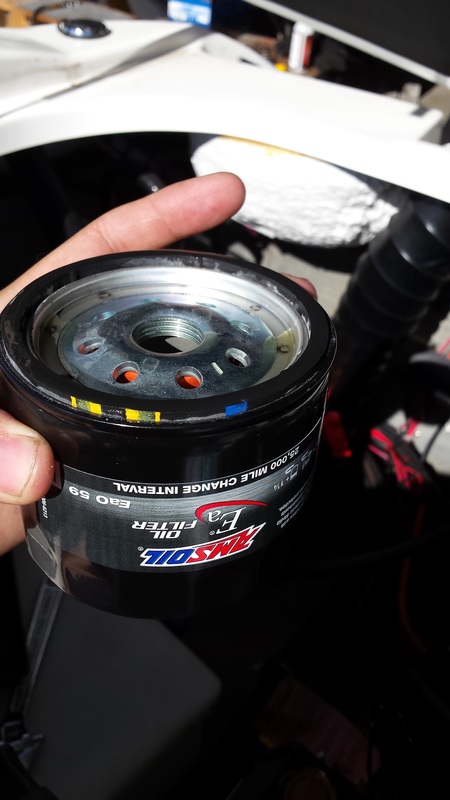
Now that oil has been pumped out, it's time to remove the old oil filter. This part can be challenging. Oil filters are often over tightened, in addition you do not have room to get a good grip on the filter. You will often need a filter wrench to remove it. Guess what! There's not a lot of room for a filter wrench either... Place some rags underneath the filter, or some oil absorbing matts if you have some. Some oil will leak out once the filter is removed. Have a small pan, or drip tray ready for the filter, it will also be full of oil.
Getting the old filter off can be tricky.
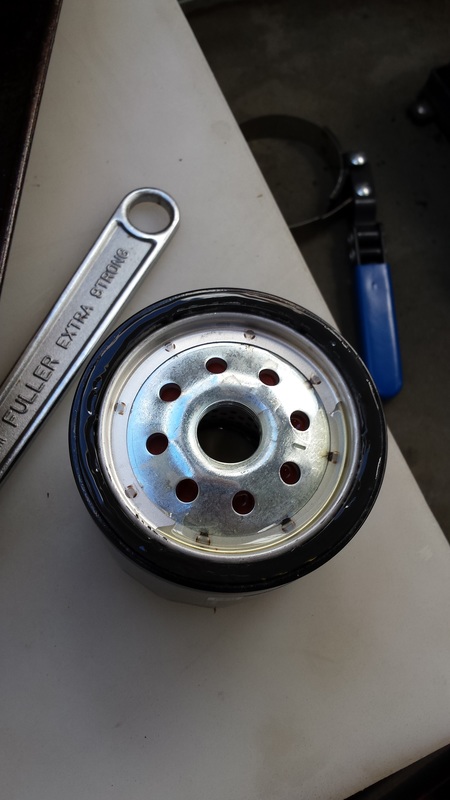
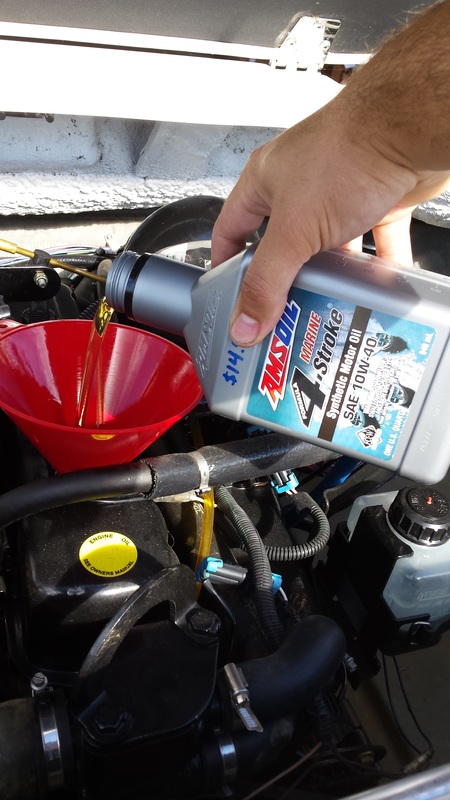
Now that the old filter is removed, Its time for a new one! Open a bottle of your new oil. put some fresh clean oil on the seal of your new filter. They seal best if you wet them with oil, and use clean oil - not used oil. You can them install the filter. I typically recommend only putting a filter on hand tight (no wrench). Because of the location of this filter, it is difficult to get a good grip on it. You may require a filter wrench to get it on securely. Be careful not to over tighten it (you will understand why if you had a hard time getting it off!) Make sure that the seal from the old seal came off with the filter and is not stuck to the housing. A double seal will leak.
Use fresh oil to lubricate the seal on the filter
|
|
Do not cheap out when selecting the oil for your engine. Marine engines actually require a higher quality of oil than your car. This is because a marine engine works harder, and is subject to severe operating conditions. A quality marine oil has more additives, and will also help protect against water contamination, which is not uncommon on boats.
Of course after you fill the engine with oil, use the dipstick to make sure it is filled to the top of the safe mark. Run the engine and re check it afterward. the oil level will drop slightly as the engine must fill up the oil filter.
Draining the Engine
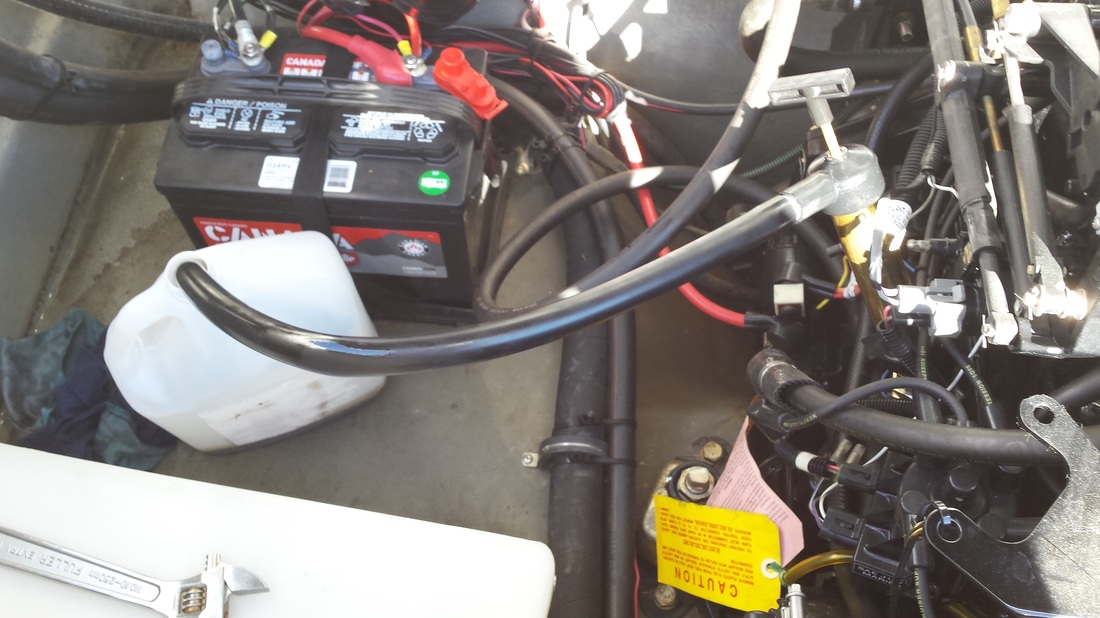
Getting the water out of the engine is the most important part of the winterization process. If water is left inside of the engine to freeze, it will cause the block to crack. There are many different procedures to winterizing, and different engines require different methods. First thing is to take a look at your engine, and find the drains for the cooling system. (most marine engines run lake water directly through the block for cooling. This is why it must be drained.)
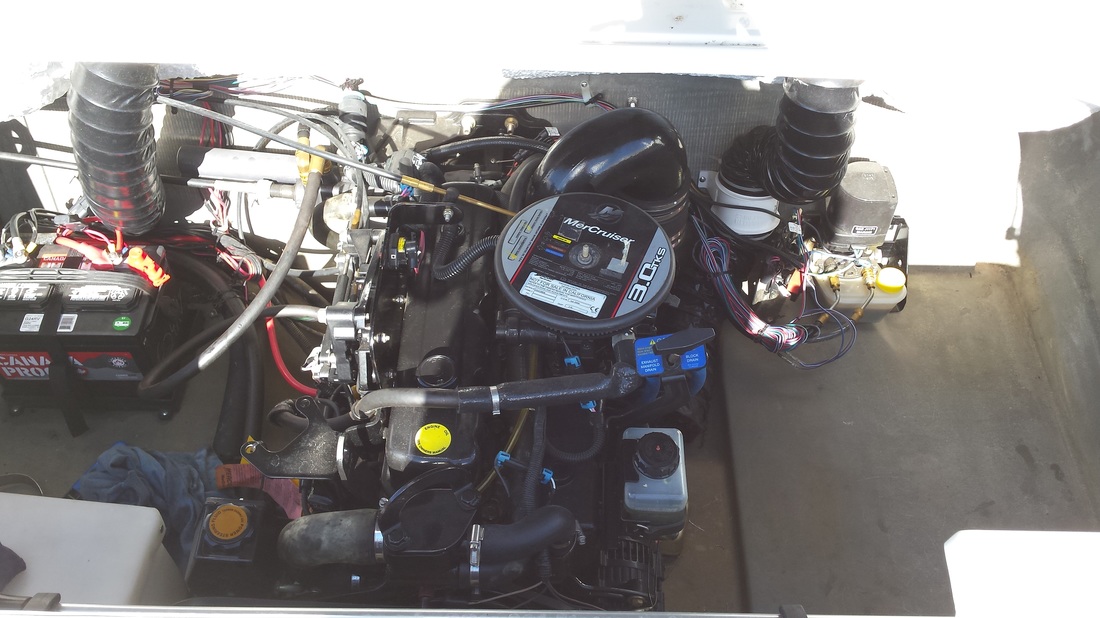
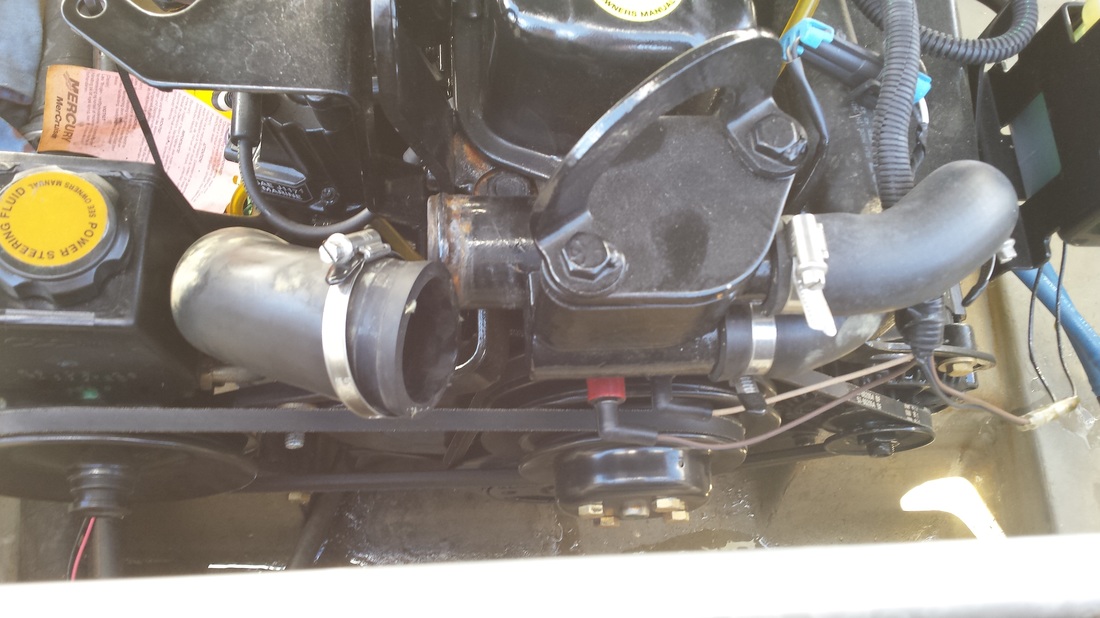
View of the entire engine
This 3.0L Mercruiser engine has quick connect hoses for easy draining. Some other engine have several plugs on the block, and exhaust system that must be located and removed for proper drainage.
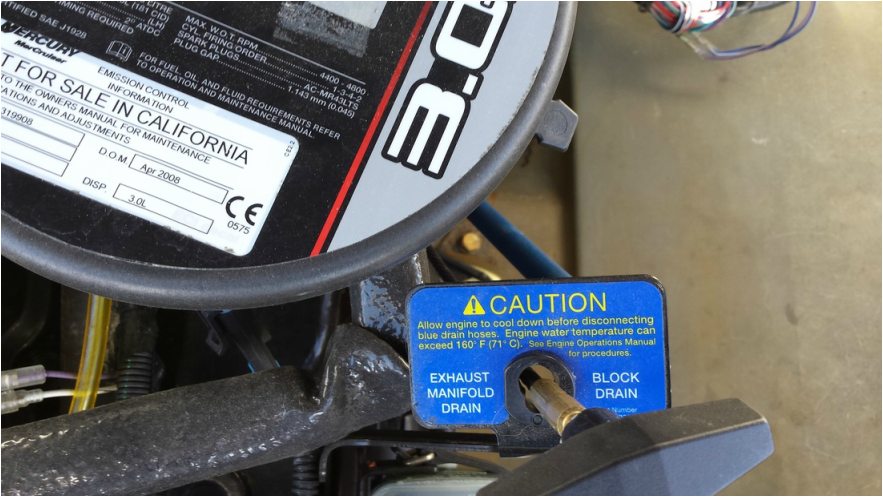
Drain hoses
|
One hose drains the exhaust / intake manifold. The other drains the block.
|
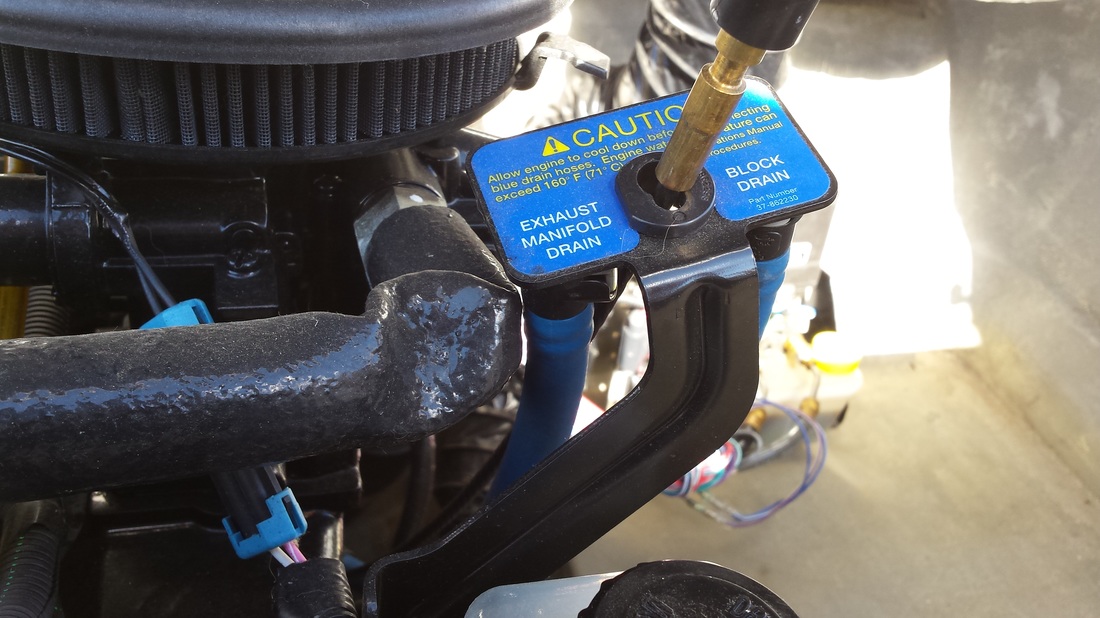
Disconnect the hoses and push them to the bottom of the boat to start draining them. Allow them to drain completely.

Push both down and allow adequate time to drain all remaining water.
Disconnect these three hoses. Pour antifreeze down each hose until it can be seen, or heard coming out of the system. This flushes out any remaining water and replaces it with antifreeze. If you wish to be thorough, you can also blow air down each hose to make sure all fluid it out.
Pour antifreeze down all three of these hoses to flush out any remaining water. any water left over will now be mixed with antifreeze.
There are also kits available for purchase that include a tank of antifreeze, a hose, and ear muffs. These kits allow you to start and run the engine. The water pump will circulate the antifreeze through the system through the cooling system expelling any water and replacing it with antifreeze. (Do not run engine without water OR antifreeze hooked up to the water intake for more than a few seconds. Water pump damage will occur if run dry.)
Fogging the engine
Fogging the engine prevents corrosion on internal engine components. There are many methods you can use to fog an engine.
1) Remove the air cleaner. With the engine running (remember to have your earmuffs hooked up to water or antifreeze.) Spray the lubricant into the air intake. It may cause the engine to run rough, smoke or stall. If the engine stalls while spraying the fogging lubricant, the engine is fogged and the process is complete. If the engine does not stall have somebody kill the engine while spraying the lubricant into the intake. If you do not want to run the engine, You can also do the same procedure with the kill switch in the off position. Simply crank the engine over while spraying the lubricant int.
1) Remove the air cleaner. With the engine running (remember to have your earmuffs hooked up to water or antifreeze.) Spray the lubricant into the air intake. It may cause the engine to run rough, smoke or stall. If the engine stalls while spraying the fogging lubricant, the engine is fogged and the process is complete. If the engine does not stall have somebody kill the engine while spraying the lubricant into the intake. If you do not want to run the engine, You can also do the same procedure with the kill switch in the off position. Simply crank the engine over while spraying the lubricant int.
2) If it is not easy to access the air cleaner, this method may be easier. Remove the spark plugs. Spray lubricant into each plug hole. With the kill switch OFF crank the engine over a few times. Repeat this a couple of times. If you are working with a 2-cycle engine, you may use spray fog lubricant OR a quality 2-stroke motor oil inside the cylinders.
3) Engines equipped with Electronic Fuel Injection (EFI) systems have fuel injectors that can be removed. Often they are attched to a rail that can be removed with only 2 or 3 screws. Remove the fuel injectors and spray fogging oil inside the engine.With the kill switch OFF crank the engine over. Repeat this a few times. Re-install the fuel injectors.
Amsoil products
There are several reasons we use Amsoil products. Amsoil manufacturers very high quality lubricants and fuel additives. These performance products improve performance, reduce fuel consumption, and extend equipment life. Its worth the extra dollar per liter. Amsoil products are also environmentally friendly for all applications including marine.
To buy Amsoil products visit this link http://www.amsoil.com/index.aspx?zo=1928833
To buy Amsoil products visit this link http://www.amsoil.com/index.aspx?zo=1928833